[

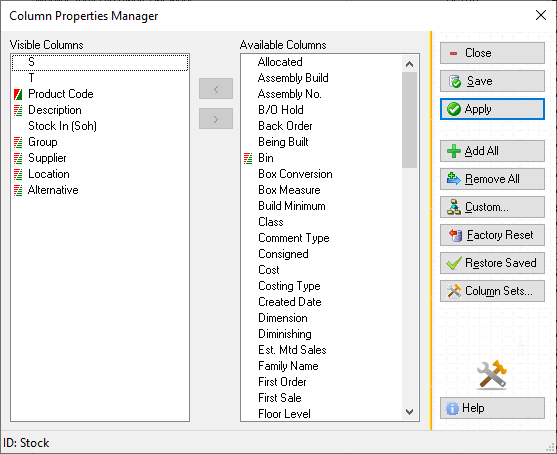
The columns that are visible on the grid are displayed in the list to the left and all available columns are displayed in the list to the right. To add columns to the visible list, click on the column under the Available Columns list using your mouse and then press the < (left arrow) button found between the lists. To remove a column from the visible list click on a column heading found under the Visible Column list and press the > (right arrow) button.
You can select multiple columns at once. Click on all columns to move before pressing either button or click again to unselect. You can also change the position of the column in the Visible Column list by dragging the column into a new position using your mouse. Click on the column you wish to
move found on your list, hold the left mouse button down, and then drag the column into the position you want by moving your mouse.
When you are happy with your new column arrangement, press the Save button. If you want to see how the arrangement will look first before committing to saving, press Apply and then Close. You can always return to the Column Properties Manager and press Save if you wish to permanently save your Column Arrangements. When you are finished working in the Column Properties Manager press Close.
